dvbcss-synckit-ios
A simple synchronised video demo companion app
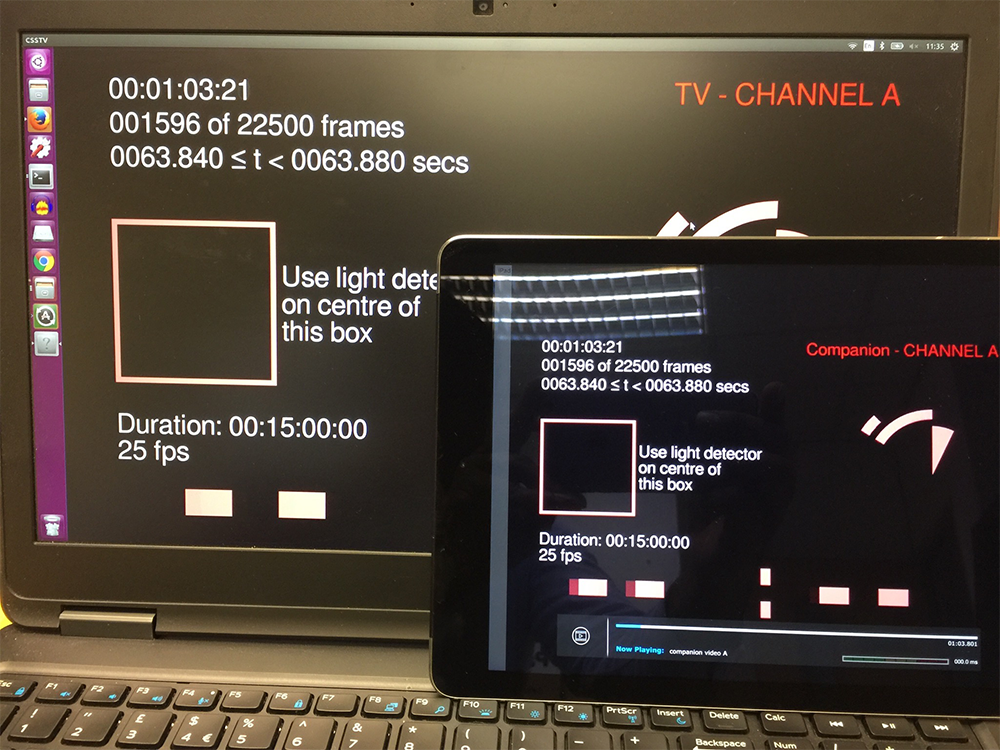
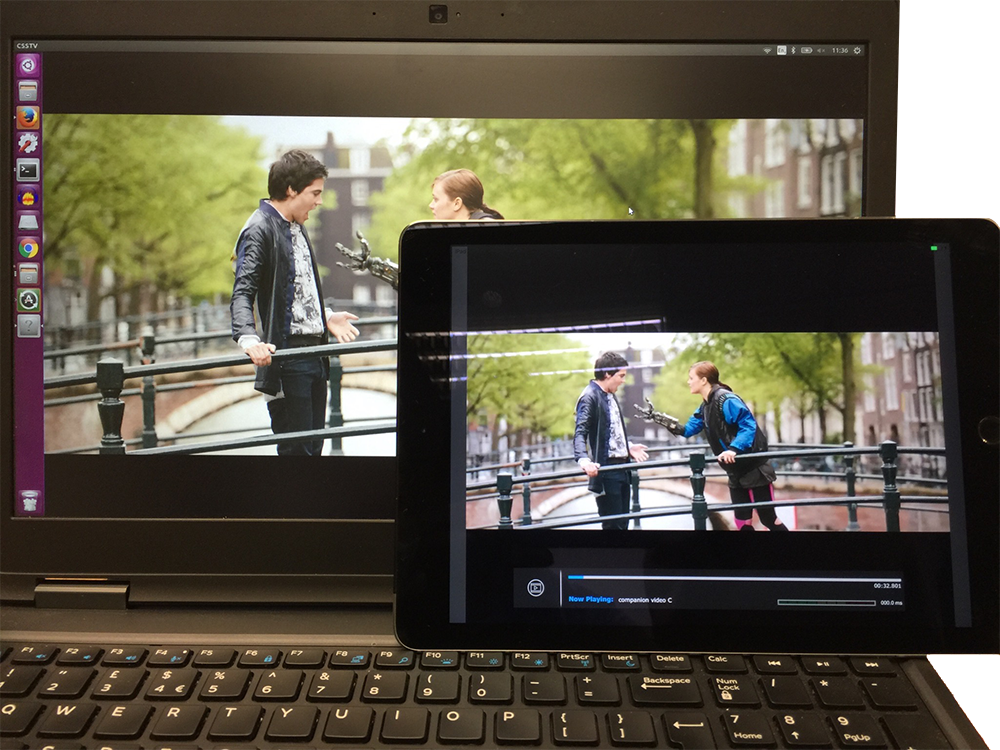
This demo app demonstrates the synchronisation of companion videos to a broadcast stream that embeds a TEMI timeline using SyncKit’s CSASynchroniser framework.
It provides an example of how to the use of the SyncKit library’s Synchroniser object. It shows how in response to a change of contentId signalled by the TV, the companion screen app can load a relevant media object and register it with a Synchroniser object for synchronisation.
Running the demo app
To run the demo app, follow these steps
Step 1: Open the demo app
This demo app is part of the dvbcss-synckit-ios distribution. After you have cloned the repository, open the workspace synckit.xcworkspace in XCode.
The code for the demo app is in the SyncKitVideoSyncDemoApp project.
Step 2: Get the TV and companion Content
The example app assumes that the TV is playing the mux.ts.24mbit.with_temi.ts
broadcast transport stream. This transport stream has both PTS and TEMI timelines signalled in it. The demo companion app uses the TEMI timeline for synchronisation (switching to PTS timeline is trivial).
The broadcast transport stream and companion content for each of the channels it contains are available from this site: https://hbbtv-2-0-testing-1.virt.ch.bbc.co.uk/downloads/simple-free-sync-seq-1.zip
Download this zipped file and extract it into a known location on your build device.
Rename the following files as suggested:
channel_a.companion/video.mp4file tochannel_a.companion/video_a.mp4channel_b.companion/video.mp4file tochannel_b.companion/video_b.mp4channel_c.companion/video.mp4file tochannel_c.companion/video_c.mp4
Step 3: Add the companion content to the demo app
In the SyncKitVideoSyncDemoApp project, right-click on the Supporting Files folder and select the Add files to SyncKitVideoSyncDemoApp .. option.
In the dialog that follows, select these files from the location where you originally downloaded them and add them to SyncKitVideoSyncDemoApp project:
channel_a.companion/video_a.mp4channel_b.companion/video_b.mp4channel_c.companion/video_c.mp4
Step 4: Build and run the demo app
In XCode, select the SyncKitVideoSyncDemoApp build scheme and launch the build process to deploy the app into a selected target iOS device (or iOS simulator).
Make sure that the TV and the companion device are on the same network
When the demo app starts, the first screen on the companion app shows TV devices discovered via DIAL on the local network.

After the TV is selected, the demo app connects to the TV’s CSS-CII protocol endpoint. Upon receiving a CII message, the demo app creates a Synchroniser object to synchronise the companion content (the Synchroniser is initialised to use the TEMI timeline). It also loads the relevant companion video but does not start it. When the TV’s TEMI timeline is available (i.e. the companion starts receiving timeline updates via the CSS-TS protocol), the companion app’s Synchroniser object adjusts the video playback to cause it to be in sync.

The companion video is synchronised to within a frame with the TV.


Using other timelines for sync in the demo app
Assuming you have an HbbTV2.0 compliant TV/device on the network, or a DVB-CSS TV emulator, it is possible to discover its current content identifier and the timelines the device exposes for synchronisation.
Step 1: Discover available timelines
To discover available timelines, you may use a CII client to connect to your TV’s CSS-CII protocol server endpoint. A CII client can be obtained from the pydvbcss distribution.
You can run the pydvbcss CII protocol python client as follows:
$ python examples/CIIClient.py ws:/<TV_IP_ADDRESS>:7681/cii
A sample output of the tool looks like this:
$ python examples/CIIClient.py ws://192.168.1.102:7681/cii
INFO:CIIClient:connected
INFO:CIIClient:change to presentationStatus property. Value is now: [u'okay']
INFO:CIIClient:change to protocolVersion property. Value is now: 1.1
INFO:CIIClient:change to mrsUrl property. Value is now: None
INFO:CIIClient:change to timelines property. Value is now: [TimelineOption(timelineSelector="urn:dvb:css:timeline:pts", unitsPertick=1, unitsPerSecond=90000, accuracy=OMIT private=OMIT), TimelineOption(timelineSelector="urn:dvb:css:timeline:temi:1:128", unitsPertick=1, unitsPerSecond=1000, accuracy=OMIT private=OMIT)]
INFO:CIIClient:change to tsUrl property. Value is now: ws://192.168.1.102:7682
INFO:CIIClient:change to wcUrl property. Value is now: udp://192.168.1.102:6677
INFO:CIIClient:change to contentIdStatus property. Value is now: final
INFO:CIIClient:change to contentId property. Value is now: dvb://ffff.fffe.044f;0bb9~20150331T1500Z--PT00H15M
INFO:CIIClient:CII is now: CII(presentationStatus=[u'okay'], protocolVersion=u'1.1', mrsUrl=None, timelines=[TimelineOption(timelineSelector="urn:dvb:css:timeline:pts", unitsPertick=1, unitsPerSecond=90000, accuracy=OMIT private=OMIT), TimelineOption(timelineSelector="urn:dvb:css:timeline:temi:1:128", unitsPertick=1, unitsPerSecond=1000, accuracy=OMIT private=OMIT)], tsUrl=u'ws://192.168.1.102:7682', wcUrl=u'udp://192.168.1.102:6677', contentIdStatus=u'final', contentId=u'dvb://ffff.fffe.044f;0bb9~20150331T1500Z--PT00H15M')
- The contentId in this example is
dvb://ffff.fffe.044f;0bb9~20150331T1500Z--PT00H15M - Available timelines are given by the timelines field:
timelines=[TimelineOption(timelineSelector="urn:dvb:css:timeline:pts", unitsPertick=1, unitsPerSecond=90000, accuracy=OMIT private=OMIT), TimelineOption(timelineSelector="urn:dvb:css:timeline:temi:1:128", unitsPertick=1, unitsPerSecond=1000, accuracy=OMIT private=OMIT)]
Step 2: Select an available timeline e.g. PTS
You can use one of the listed timelines for synchronisation.
For example, to make the demo app use the PTS TV timeline for synchronisation, you will need to do the following:
Step2a: Initialise the Synchroniser object to use the PTS timeline.
In the viewDidLoad() method in the ViewController class (ViewController.m file), specify the PTS timeline in the initialisation routine:
[self.mediaSynchroniser initWithInterDeviceSyncURL:device.HbbTV_InterDevSyncURL
                                                                         App2AppURL:device.HbbTV_App2AppURL
                                                                       MediaObjects:nil
                                                                   TimelineSelector:pts_timeline
                                                                           Delegate:self];
where pts_timeline is an object that describes a PTS timeline. It is already defined in the ViewController class (ViewController.m file) as follows:
// ...
NSString* const kPTS_TimelineSelector = @"urn:dvb:css:timeline:pts";
int const kPTS_UnitsPerTick = 1;
int const kPTS_UnitsPerSecond = 90000;

// ...

pts_timeline = [TimelineOption TimelineOptionWithSelector:kPTS_TimelineSelector
                                                 UnitsPerTick:kPTS_UnitsPerTick
                                               UnitsPerSecond:kPTS_UnitsPerSecond
                                                     Accuracy:0];
Step2b: Modify media object correlations to refer to the PTS timeline
For each media object representing a specific companion content, change its correlation to refer to the PTS timeline.
The correlation is a pair of timestamps representing a time on the TV timeline and the corresponding time on the companion content’s timeline.
For example, for companion video A, the media object’s correlation is modified as follows:
- (void) Synchroniser: (Synchroniser*) synchroniser NewContentInfoAvailable:(CII*) cii ChangeMask:(CIIChangeStatus) cii_change_mask
{
  // ...
  Correlation PTS_Timeline_corel = [CorrelationFactory create:A_PTS_Timeline_Start_Pos Correlation: Video_A_Timeline_Start_Pos];

  mediaObj.correlation = PTS_Timeline_corel;
  mediaObj.mediaTitle = @"companion video A";
  mediaObj.mediaMIMEType = @"video/mp4";
  mediaObj.priority = [NSNumber numberWithInt:1];
  // ...
}
The values for the correlation’s parent timeline timestamp are already defined as constants in ViewController.m.
int const A_PTS_Timeline_Start_Pos = 900000;
int const A_TEMI_Timeline_Start_Pos = 0;
int const A_SET_Timeline_Start_Pos = 0;
Contact
The original author is Rajiv Ramdhany ‘at’ bbc.co.uk.
Licence
The CSASynchroniser iOS Framework is developed by BBC R&D and distributed under the Apache License, Version 2.0.
© Copyright 2016 BBC R&D. All Rights Reserved
 View on GitHub
 Simple Synchronised Video Demo App Reference